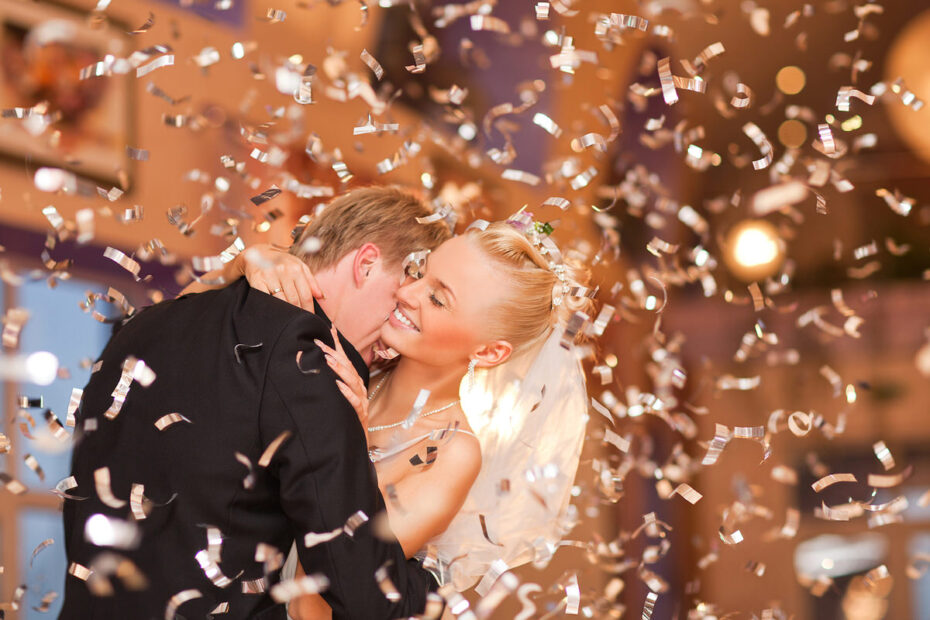
I’ll never forget standing in that dimly lit ballroom during my early days as a wedding photographer, watching the couple’s first dance unfold before me. Golden hour had long passed, the DJ had transformed the venue into what felt like a nightclub, and my camera was struggling desperately to capture anything remotely usable. My images were either frustratingly blurry, harshly overexposed, or simply embarrassing. That moment taught me something crucial: natural light skills alone won’t carry you through an entire wedding celebration.
Learning to work with artificial lighting during receptions felt overwhelming at first. There were countless buttons, mysterious settings, and technical jargon that seemed designed to confuse rather than clarify. But here’s what I discovered through years of trial and refinement: mastering reception flash doesn’t require you to become a lighting engineer. What it demands is understanding a few fundamental principles and developing a reliable system you can execute confidently when moments unfold rapidly around you.
This comprehensive guide walks you through everything I wish someone had explained to me when I started. We’ll explore equipment selection, demystify technical settings, discuss strategic placement, and share practical techniques that work consistently in real-world wedding environments. Whether you’re photographing your first reception or looking to refine your existing approach, these insights will help you create beautifully lit images that preserve the emotion and energy of the celebration.
Building Your Foundation: Essential Equipment Selection
Before diving into technique, let’s talk about the tools that make everything possible. Your equipment choices directly impact your ability to work efficiently during fast-paced reception moments. I’ve learned that investing in reliable gear from the beginning saves countless headaches down the road.
When selecting your primary speedlight, compatibility matters tremendously. I always recommend choosing units manufactured by your camera brand whenever possible. These native flashes communicate seamlessly with your camera body, reducing misfires and technical glitches when you can least afford them. For Canon shooters, the Speedlite 430EX III-RT offers excellent performance and wireless capabilities right out of the box. Nikon photographers should consider the SB-5000, which provides robust power output and advanced features. If you’re working with a tighter budget, the Godox V1 system delivers impressive results for both camera systems at a more accessible price point.
Power output deserves serious consideration during your selection process. Reception venues frequently feature soaring ceilings, dark corners, and challenging architectural elements that demand substantial flash strength. A underpowered unit will leave you constantly maxing out your settings, draining batteries rapidly, and missing shots while waiting for recycle times. Look for speedlights that offer full manual control alongside automatic modes, giving you flexibility as your skills develop.
Recycle time represents another critical specification that many beginners overlook. This measurement indicates how quickly your flash can fire again after discharging. During dynamic moments like bouquet tosses or energetic dancing, a sluggish recycle time means missed opportunities. Quality speedlights typically recharge within two to three seconds, allowing you to capture consecutive moments without frustrating delays. Cheaper alternatives might leave you waiting significantly longer, which becomes problematic when documenting spontaneous celebrations.
Battery management deserves thoughtful planning before your first reception. I switched to rechargeable battery systems years ago and haven’t looked back. The Eneloop rechargeable batteries paired with a quality charger represent a smart investment that pays dividends over time. You’ll burn through disposable batteries at an alarming rate during typical receptions, making rechargeable options both economically and environmentally sensible. Always carry multiple charged sets to your events, because running out of power during critical moments creates unnecessary stress.
Light modification tools transform harsh direct flash into something far more flattering and professional. The MagMod system has become my go-to solution for its simplicity and versatility. The MagSphere diffuses light beautifully when you need softer illumination, while the MagBounce helps redirect flash in venues lacking suitable reflective surfaces. These magnetic modifiers attach and detach instantly, allowing you to adapt quickly as lighting conditions change throughout the evening. Some photographers prefer traditional bounce cards or small softboxes, and those certainly work well too. The key is finding modifiers that integrate smoothly into your workflow without slowing you down.
Decoding Flash Modes: Finding Your Comfort Zone
Understanding the different operational modes available on your speedlight empowers you to choose the right approach for various situations. Each mode offers distinct advantages and limitations that affect how you work during receptions.
TTL mode functions as an automatic exposure system for your flash. When activated, your camera and flash communicate to determine appropriate power output based on the scene’s metering. This mode provides a reasonable starting point for photographers still developing their flash skills. The camera does much of the thinking for you, allowing you to focus on composition and timing. However, TTL can produce inconsistent results as lighting conditions shift, and you sacrifice precise control over your final exposure. I used TTL extensively when starting out, and it served me well during that learning phase.
Manual mode represents where I eventually landed and where I encourage you to aim as you gain confidence. In manual operation, you directly control the flash power output, typically measured in fractions like 1/4, 1/8, 1/16, or 1/32. This approach requires more initial setup and understanding, but it delivers remarkably consistent results once you dial in your settings. Think of it like cooking with precise measurements rather than guessing at ingredients. The learning curve feels steeper initially, but the payoff in image quality and consistency makes the effort worthwhile.
Understanding power ratios helps you interpret what those fractional numbers actually mean. Full power (1/1) represents your flash firing at maximum capacity, delivering the brightest possible output. As the denominator increases, the power decreases proportionally. So 1/2 power means half the maximum output, 1/4 equals one quarter, and so forth. Higher power settings drain batteries faster and increase recycle times, so I typically start around 1/16 or 1/32 and adjust from there based on what my test shots reveal.
Multi-flash mode exists on many speedlights but rarely finds practical application during wedding receptions. This setting fires your flash multiple times in rapid succession during a single exposure, creating a stroboscopic effect that shows movement across the frame. While this can produce creative results in controlled environments, the chaotic nature of reception celebrations makes it impractical for most documentary wedding photography.
Camera Settings That Complement Your Flash
Your camera settings work in concert with your flash to create properly exposed images. Understanding how each setting influences your final result allows you to make informed adjustments when conditions change.
Shutter speed takes on a different role when working with flash compared to natural light photography. Rather than primarily controlling motion blur, your shutter speed now governs how much ambient room light enters your exposure. Slower shutter speeds allow more of the existing venue lighting to register in your images, creating a balanced look that shows both your subjects and their environment. Faster shutter speeds minimize ambient light, making your flash the dominant light source and potentially creating a more dramatic, isolated look.
I typically work between 1/80 and 1/200 of a second during receptions, adjusting based on the mood I want to create and the amount of ambient light present. Remember that most cameras have a maximum flash sync speed, usually around 1/200 or 1/250. Exceeding this limit without enabling high-speed sync will create dark bands across your images where the shutter curtain blocks the flash. Stay at or below your sync speed unless you specifically need high-speed sync capabilities.
Aperture selection during flash photography requires balancing several considerations simultaneously. Your aperture controls depth of field just as it does with natural light, but it also affects how much flash power you’ll need to properly expose your subjects. Wider apertures like f/2.0 create beautiful background separation but can make achieving sharp focus challenging in dim reception environments. I generally work around f/4.0 during receptions, which provides enough depth of field to keep groups reasonably sharp while still maintaining some background softness.
ISO becomes your flexibility tool when working with flash. Rather than keeping it as low as possible like you might during daytime shooting, don’t hesitate to raise your ISO to reduce the flash power required. Modern cameras handle ISO 1600 or even 3200 remarkably well, producing minimal visible noise in your final images. I’d rather shoot at ISO 2000 with my flash at 1/32 power than ISO 400 with my flash struggling at 1/4 power. The higher ISO preserves battery life, improves recycle times, and often produces cleaner results than underexposing and pushing in post-processing.
White balance deserves attention when introducing artificial light into your images. Setting your white balance to the “Flash” preset provides a solid starting point that usually produces neutral skin tones. However, many reception venues feature colored uplighting, warm tungsten fixtures, or mixed lighting sources that complicate color accuracy. I prefer working in Kelvin mode, which gives me precise control over color temperature. Starting around 5500K typically works well with flash, but be prepared to adjust based on the specific venue’s ambient lighting characteristics.
Strategic Flash Placement for Dimensional Lighting
Where you position your flash dramatically impacts the quality and character of your images. Understanding directional lighting principles helps you create depth and dimension rather than flat, lifeless photographs.
Bouncing your flash represents the most common technique for creating soft, flattering light during receptions. Rather than pointing your flash directly at your subjects, you angle it toward a nearby ceiling or wall, using that surface as a giant reflector to diffuse and spread the light. This approach works beautifully in venues with white or light-colored ceilings at reasonable heights. The bounced light wraps around your subjects naturally, minimizing harsh shadows and creating a more three-dimensional look.
When bouncing, I typically angle my flash either straight up, at a 45-degree angle upward, or toward a side wall depending on the room’s architecture and my position relative to my subjects. Each direction produces slightly different lighting characteristics, so experiment to discover what works best in your specific environment. Watch for colored surfaces that might introduce unwanted color casts into your images. Wooden barn ceilings, for example, can add an orange tint to your photos if you’re not careful.
Venues with extremely high ceilings, dark surfaces, or outdoor reception spaces present challenges for traditional bouncing techniques. This is where your light modifiers become invaluable. A diffusion dome spreads your flash output in multiple directions, creating softer light even when you can’t bounce effectively. Bounce cards redirect a portion of your flash forward while still sending some light upward, providing a compromise solution when conditions aren’t ideal.
Transitioning to multiple light setups opens creative possibilities that single-flash approaches can’t achieve. Positioning one speedlight behind your subjects creates beautiful rim lighting that separates them from the background and adds professional polish to your images. This backlight doesn’t need tremendous power—often 1/64 or 1/32 works perfectly—but it makes a remarkable difference in the final result.
Setting up wireless flash systems requires designating one flash as your master controller and others as remote slaves. The master flash, typically mounted on your camera, triggers the remote units to fire simultaneously. Modern speedlights often include built-in wireless capabilities, but older models might require separate radio triggers. I use the master flash at very low power as a subtle fill light while relying on my remote flashes to provide the main illumination.
Grouping multiple flashes allows independent power control over different lights in your setup. You might set your backlight to group A firing at 1/32 power while your main light operates in group B at 1/8 power. This flexibility lets you fine-tune your lighting ratios without physically walking to each light stand between shots. During busy reception moments, this efficiency becomes crucial.
Practical Techniques for Common Reception Scenarios
Different reception moments demand adapted approaches to achieve optimal results. Let’s walk through strategies for the situations you’ll encounter most frequently.
Preparation spaces early in the day sometimes lack adequate natural light, particularly in hotel rooms or venues with limited windows. While I always prefer finding better-lit areas when possible, flash can save the day when you’re stuck in challenging conditions. Use minimal flash power to supplement existing light rather than overpowering it completely. Watch carefully for harsh shadows cast by your flash, which become more pronounced when your power settings run too high.
Ceremony coverage requires special consideration, as many religious venues prohibit flash photography or restrict where photographers can position themselves. Always clarify flash policies before the ceremony begins to avoid awkward situations. When flash is permitted, bouncing off side walls or using subtle fill flash helps you capture properly exposed images without creating distracting bursts of light during solemn moments.
Reception dining and toasts typically occur in dimly lit environments where flash becomes essential. I position one remote flash near the head table to provide consistent illumination on speakers and the couple throughout dinner service. This setup allows me to move freely around the room while maintaining even lighting on my primary subjects. Adjust your flash power to balance with the ambient room lighting, creating images that feel natural rather than obviously flashed.
Dance floor photography represents where flash truly proves its worth. The combination of movement, low light, and rapidly changing conditions makes this one of the most technically demanding aspects of reception coverage. I use a two-light setup with one flash on my camera for fill and another positioned behind the dance floor for rim lighting. This configuration creates depth and energy in my images while freezing motion effectively.
Your distance from subjects significantly affects flash effectiveness. Light intensity decreases rapidly as distance increases, following the inverse square law. Practically speaking, this means your flash has much less impact on subjects twenty feet away compared to subjects ten feet away. Position yourself thoughtfully to maintain reasonable working distances, typically between eight and fifteen feet for most reception moments.
Troubleshooting Common Flash Challenges
Even experienced photographers encounter flash-related issues during receptions. Recognizing these problems and knowing how to address them quickly keeps your workflow smooth.
Dark bands across your images indicate your shutter speed exceeds your camera’s flash sync speed. This happens when the shutter curtain moves faster than your flash can fully illuminate the sensor. The solution is simple: reduce your shutter speed to 1/200 or slower, or enable high-speed sync if your flash supports it and the situation demands faster shutter speeds.
Overexposed subjects with dark backgrounds suggest your flash power is too high relative to your ambient exposure. Lower your flash power incrementally until your subjects blend naturally with their environment. Alternatively, you can slow your shutter speed to bring in more ambient light, creating better balance between your flash-lit subjects and the surrounding scene.
Underexposed images despite maximum flash power indicate you’re either too far from your subjects, your ISO is too low, or your aperture is too narrow. Try raising your ISO first, as this provides the quickest fix without changing your composition or depth of field. If that doesn’t solve the problem, open your aperture or move closer to your subjects.
Inconsistent exposures between consecutive shots often result from TTL mode struggling with changing conditions. Switching to manual flash mode eliminates this variability, giving you predictable results shot after shot. Take a test image, evaluate your exposure, adjust your flash power accordingly, and then shoot confidently knowing your settings will remain consistent.
Developing Your Personal Flash Style
Technical proficiency with flash represents just the foundation. Developing a distinctive style that complements your overall aesthetic requires intentional practice and experimentation.
Some photographers prefer dramatic lighting with strong shadows and high contrast, while others favor soft, even illumination that mimics natural light. Neither approach is inherently superior—what matters is consistency with your brand and client expectations. I gravitate toward balanced lighting that preserves ambient atmosphere while ensuring my subjects are properly exposed and separated from their backgrounds.
Practicing outside of wedding environments accelerates your learning curve tremendously. Set up mock reception scenarios in your home, experimenting with different flash positions, power settings, and modifier combinations. Photograph friends and family in various lighting conditions, pushing yourself to recreate challenging situations you’ve encountered at real events. This low-pressure practice builds muscle memory and confidence that translates directly to professional work.
Studying the work of photographers whose lighting you admire provides valuable insights into different approaches and techniques. Analyze not just the final images but try to reverse-engineer the lighting setups that created them. Where were the flashes positioned? What modifiers were used? How did they balance flash with ambient light? This analytical viewing sharpens your understanding and expands your creative toolkit.
Maintaining Consistency Across Your Gallery
Creating cohesive wedding galleries requires maintaining consistent lighting quality throughout the reception coverage. Clients notice when your images shift dramatically in style and quality between different parts of their celebration.
Establishing baseline settings for your typical reception environment creates a reliable starting point you can return to repeatedly. I know that in most ballroom-style venues, I’ll begin with my flash at 1/16 power, ISO 1600, f/4.0, and 1/125 shutter speed. These settings won’t be perfect for every situation, but they get me close enough that minor adjustments dial in the exact look I want. Having this foundation eliminates the need to start from scratch with each new venue.
Monitoring your exposures throughout the evening ensures you catch and correct any drift in your settings. Chimping (reviewing your LCD screen) gets criticized sometimes, but it serves an important quality control function during receptions. I glance at my screen every few shots to verify my exposures remain consistent, particularly when moving between different areas of the venue or as ambient lighting changes during the celebration.
Post-processing workflow should complement rather than compensate for your flash technique. Well-executed flash photography requires minimal correction in editing, allowing you to maintain consistent color and tonality across your entire gallery. If you find yourself making dramatic adjustments to every flash image during editing, that signals an opportunity to refine your in-camera technique.
Confidence Through Competence
Mastering flash photography for wedding receptions transforms you from a photographer who hopes for good light into one who creates it reliably. This shift in capability expands your creative possibilities while reducing the stress that comes from feeling dependent on circumstances beyond your control.
The journey from flash novice to confident practitioner requires patience, practice, and persistence. You’ll make mistakes, create some terrible images during your learning process, and occasionally feel frustrated by the technical complexity. That’s completely normal and part of how skills develop. What matters is maintaining forward momentum, learning from each experience, and gradually building the competence that breeds confidence.
Start simple with a single flash on your camera, master bouncing techniques, and then progressively add complexity as your comfort grows. Don’t feel pressured to immediately implement elaborate multi-light setups if you’re still developing fundamental skills. Solid execution of basic techniques produces far better results than poorly executed advanced approaches.
Remember that flash serves your creative vision rather than dictating it. The technical aspects we’ve covered provide tools for achieving your artistic goals, but they’re means to an end rather than the end itself. Stay focused on capturing authentic emotion, genuine moments, and the unique story of each celebration. When your flash technique becomes second nature, you’ll find yourself thinking less about settings and more about storytelling—which is exactly where you want to be.